Welcome to the DIY page. There are several reasons why I created this. The main one is that I think that what I do is not something exclusive. In my opinion everybody who wants to put some effort in it can achieve the same result. These words are just meant to help you get started. Another reason is that I’m getting older and start to forget things. That’s why I use this as a sort of reminder.
Instead of creating multiple static pages, I decided to put everything on a single continuous page that I can regularly update or edit. English is not my native language, this means errors will occur. Especially when it comes to software, because I run almost everything in Dutch. Also I'm not an eloquent writer, I have a background as a teacher so I have made some courses in the past, but for mathematics you don't need a lot of words.
It is not my intention to provide you with detailed instructions or in-depth reviews. There are plenty of other sites where you can find that sort of content. The things I will talk about are the basics and some tips and tricks to help you on your way. Almost all software I use is free and open source, with a few reasonably priced exceptions.
I never use AI. Even the term repulses me, intelligence is more than just a neural network. There are some scientific uses I can comprehend if it's well supervised. Generative slop is an absolute NO!
I have no ties to any software developer, so I am in no way influenced by them, nor do I wish to influence others to purchase the software discussed (if applicable).
Since a very young age I was interested in mathematics. My father was a teacher in mathematics so I was fortunate to inherit some of those skills. In high school, I started the science track combined with Latin. After some years I dropped the Latin and continued in math and science. I graduated from high school with a focus on industrial sciences. After that, I went to college to study computer science. Back then, this was something completely new (home computers were just starting to become popular), so the focus was mainly on science rather than programming. That was not my goal so I dropped out and studied morality and philosophy, but that was not a smart move so I quit that as well. So I went back to the subjects I was good at—math and physics—and earned a bachelor’s degree in those subjects to become a high school teacher.
As a child, I attended art school and music school. I was very mediocre in arts so that only lasted a few years. At music school, I studied music theory and was on the waiting list to study piano. After four years I had enough of the theory so I quit without learning to play an instrument. When I was in my early twenties, I picked it up again and taught myself to play the bass guitar. I made music with others and on my own with a 4-track recorder and some midi equipment. Later on I created and edited audio on computers using all kinds of software. After a bicycle accident, I have a permanent shoulder injury that prevents me from playing an instrument with physical intensity.
In the mid-1980s, I got a Commodore 64 and learned to program in BASIC on it. My first introduction with the internet was in 1994 and I have been online since 1998. The first website I created dates back to the beginning of this century. At first, I mainly used FrontPage, but the results weren’t always satisfactory, so I started working with the code as well. Around that time, I also started exploring graphic design software, mainly for the website, but also for personal reasons, such as the first software for displaying fractals.
I have been an amateur photographer, and I used to develop black-and-white photos in my own makeshift darkroom with various results.

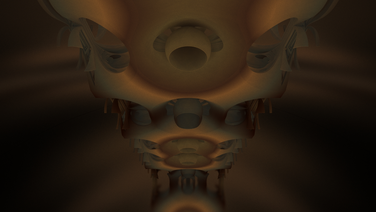
3D fractal rendering software - All platforms - Free
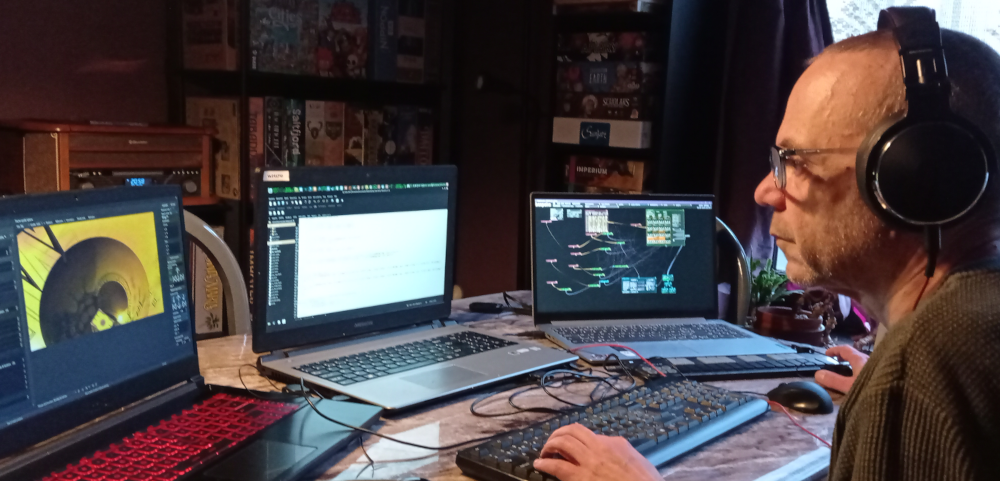
To get the best rendering results, you need a system with a good CPU and, preferably, a very good GPU. Because of the enormous amount of calculations involved, rendering highly detailed images can take a very long time. I bought a good gaming laptop specifically for this purpose and do other things on other systems. And even then, I often render at night while I sleep. As soon as you start rendering, you’ll see an estimated time in the bottom right corner, and sometimes you’ll need to adjust the settings to get a reasonable estimate. The longest render I’ve done so far took about 16 hours.
After downloading and installing the software on your system, open the preferences to enable rendering on your GPU and "openCL" (see the enclosed manual for this). You can use multiple cards to work together as one unit.
Most of the options in the menu are self-explanatory. After rendering, I save the file as a JPG. Unless I only want the fractal with a transparent background (16-bit PNG with alpha channel; use a black background for best results).
 In the toolbar on the top you will see some thumbnails you can render immediately. I removed all of those and use this bar for my starting setups.
When I'm exploring fractals I use this bar to make a tumbnail of something I might want to go back to after further exploring, because the smallest changes can sometimes
lead to completely different results and it's hard to go back once you have changed several parameters. You can always save your settings but I find this a faster way to do things.
In the toolbar on the top you will see some thumbnails you can render immediately. I removed all of those and use this bar for my starting setups.
When I'm exploring fractals I use this bar to make a tumbnail of something I might want to go back to after further exploring, because the smallest changes can sometimes
lead to completely different results and it's hard to go back once you have changed several parameters. You can always save your settings but I find this a faster way to do things.
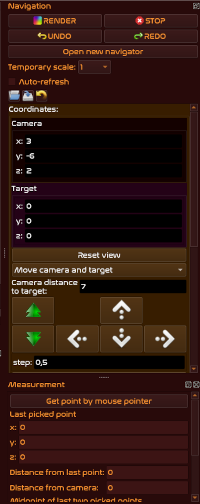 On the right of the main view (where your fractal will render) you see
the navigation controls. The most important button is, of course, the “Render” button, but I also use the “Undo” button a lot
(especially when adjusting the camera position, unexpected things can happen). If you click on "Open a new navigator"
you will open a navigation screen with the current settings. This is a very usefull screen but I never open it in this way, so more on this later.
The default coordinates ensure that your fractal is centered in the frame, with the camera positioned slightly higher (z) and angled slightly downward.
I rarely use these, because I prefer a more mathematical approach (especially when working with multiple fractals at the same time). So apart from the distance
between the camera and the object (y), I put everything on zero. After I am satisfied with the fractal(s), I often adjust the position of the camera (distance &
rotation) with the buttons. The "Measurement" on the bottom can be very handy when using mist or DOF (blur effect).
On the right of the main view (where your fractal will render) you see
the navigation controls. The most important button is, of course, the “Render” button, but I also use the “Undo” button a lot
(especially when adjusting the camera position, unexpected things can happen). If you click on "Open a new navigator"
you will open a navigation screen with the current settings. This is a very usefull screen but I never open it in this way, so more on this later.
The default coordinates ensure that your fractal is centered in the frame, with the camera positioned slightly higher (z) and angled slightly downward.
I rarely use these, because I prefer a more mathematical approach (especially when working with multiple fractals at the same time). So apart from the distance
between the camera and the object (y), I put everything on zero. After I am satisfied with the fractal(s), I often adjust the position of the camera (distance &
rotation) with the buttons. The "Measurement" on the bottom can be very handy when using mist or DOF (blur effect).
 On the left side of the main screen is the control panel with the various tabs (Material editor, Effects, Image adjustments, Rendering engine and Objects).
Mandelbulber comes with many built-in examples (see under File in the menu) to help you on your way. Also when you hover your mouse over the elements, a text box
with more information will appear, so you don't have to remember everything. The objects are divided in Logarithmic DE (Distance Estimation),
Linear DE, Josleys-Kleinian DE, Pseudo Kleinean DE, Custom DE - dIFS Formulas (Iterated Function Systems) - dIFS transforms - non-dIFS formulas,
Logarithmic delta-DE, Linear DE, Transforms & Hybrid coloring.
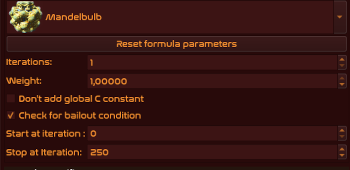
With some fractals you have to adjust some parameters, when you select these you
will see a note with which and where you have to make adjustments. When you click on a dice icon you will randomize the settings, in the case of objects an
customable pop-up window will appear. Often when you render an object you can get a black or one color result, this is almost always because the object
collides with your camera. This often can be resolved with adjusting the "Global parameters" on the left tab. My starting setups all have a X-axis rotation of -45°.
On the left side of the main screen is the control panel with the various tabs (Material editor, Effects, Image adjustments, Rendering engine and Objects).
Mandelbulber comes with many built-in examples (see under File in the menu) to help you on your way. Also when you hover your mouse over the elements, a text box
with more information will appear, so you don't have to remember everything. The objects are divided in Logarithmic DE (Distance Estimation),
Linear DE, Josleys-Kleinian DE, Pseudo Kleinean DE, Custom DE - dIFS Formulas (Iterated Function Systems) - dIFS transforms - non-dIFS formulas,
Logarithmic delta-DE, Linear DE, Transforms & Hybrid coloring.
With some fractals you have to adjust some parameters, when you select these you
will see a note with which and where you have to make adjustments. When you click on a dice icon you will randomize the settings, in the case of objects an
customable pop-up window will appear. Often when you render an object you can get a black or one color result, this is almost always because the object
collides with your camera. This often can be resolved with adjusting the "Global parameters" on the left tab. My starting setups all have a X-axis rotation of -45°.
 As soon as you open a second object (of the possible nine) you have to choose between the "Boolean mode" and "hybrid fractals". You can
always switch to a different mode with the "Hybrid" tab on the left. When you choose "hybrid" more iterations settings appear. Fractals
are constructed through iterations. This means that the coordinates obtained after a calculation are reinserted into the formula until the maximum is
reached. The first object always determines the shape; you can move them using the small arrow buttons on the tab. If you have two objects (A & B)
with the iterations on one the resulting sequence is A-B-A-B..., changing the iterations of object A to three will give A-A-A-B-A-A-A-B... . The first
object must always start at iteration 0 (for obvious reasons), but from the second object on you can change where it starts. So with two
iterations for object A and one for object B that starts at iteration 5, you'll get the following sequence A-A-A-A-B-A-A-B-A-A-B... .
As soon as you open a second object (of the possible nine) you have to choose between the "Boolean mode" and "hybrid fractals". You can
always switch to a different mode with the "Hybrid" tab on the left. When you choose "hybrid" more iterations settings appear. Fractals
are constructed through iterations. This means that the coordinates obtained after a calculation are reinserted into the formula until the maximum is
reached. The first object always determines the shape; you can move them using the small arrow buttons on the tab. If you have two objects (A & B)
with the iterations on one the resulting sequence is A-B-A-B..., changing the iterations of object A to three will give A-A-A-B-A-A-A-B... . The first
object must always start at iteration 0 (for obvious reasons), but from the second object on you can change where it starts. So with two
iterations for object A and one for object B that starts at iteration 5, you'll get the following sequence A-A-A-A-B-A-A-B-A-A-B... .
In the "Boolean mode" you have more options for the material and the positioning for each object. In the "Hybrid" tab you can change the operators between Union (standard), Intersection and Complement. These last two operations are a bit more difficult to predict but can create very special results (for example with using the same object twice but with slightly different parameters and material).
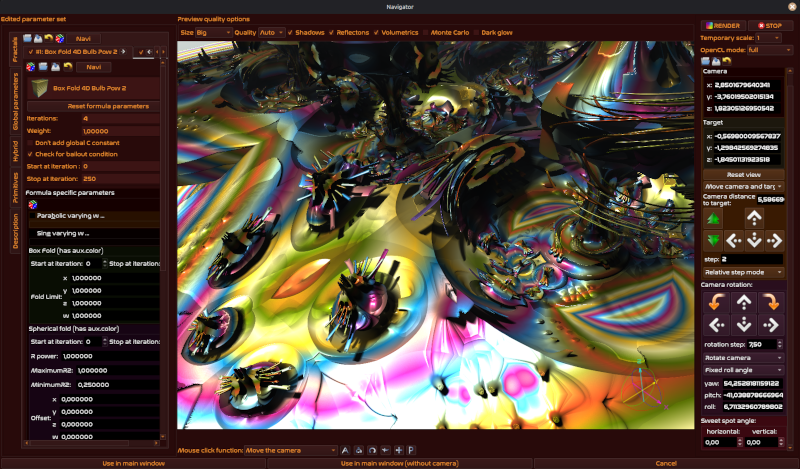 In several tabs in the control panel you will find a "Navi" button. Clicking this opens a handy navigator window where you can adjust the parameters
and see the result almost immediately. You can adjust the parameters by entering values, using the slider, or incrementally with the buttons.
Be careful when using the slider; too many sudden changes may cause the program to crash due to the complexity of the calculations.
You can always save your changes before modifying the rest. When using Boolean mode, the top button allows you to modify only the
first object. For the other objects, you must use the button in the tab. In the Navigator, you’ll spend most of your time exploring objects,
effects such as lighting, and adjusting materials.
In several tabs in the control panel you will find a "Navi" button. Clicking this opens a handy navigator window where you can adjust the parameters
and see the result almost immediately. You can adjust the parameters by entering values, using the slider, or incrementally with the buttons.
Be careful when using the slider; too many sudden changes may cause the program to crash due to the complexity of the calculations.
You can always save your changes before modifying the rest. When using Boolean mode, the top button allows you to modify only the
first object. For the other objects, you must use the button in the tab. In the Navigator, you’ll spend most of your time exploring objects,
effects such as lighting, and adjusting materials.
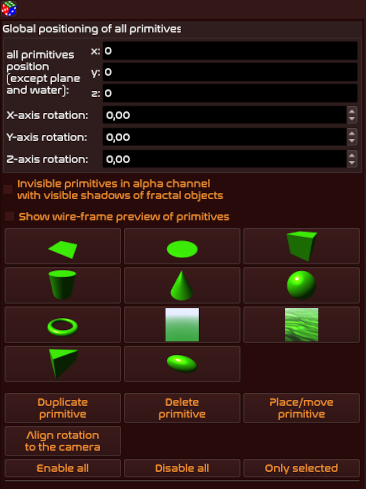 In addition to fractals, you can also add primitives to your composition. Materials that use colors from a gradient do not work on a primitive, but
you can always use an image texture to work around that. These primitives can be used with a reflective material to create a mirror effect,
and if you use a luminous material you can create a light source in the image.
The 3D primitives can be made hollow (empty inside). If you make them just large enough to contain the object and the camera, special effects can be created with the
right material (reflective, luminous, etc.). They can also be used as a container
for fog or cloud effects. Regular backgrounds do not cast shadows; if you want this, simply use a 2D primitive placed behind the object.
In addition to fractals, you can also add primitives to your composition. Materials that use colors from a gradient do not work on a primitive, but
you can always use an image texture to work around that. These primitives can be used with a reflective material to create a mirror effect,
and if you use a luminous material you can create a light source in the image.
The 3D primitives can be made hollow (empty inside). If you make them just large enough to contain the object and the camera, special effects can be created with the
right material (reflective, luminous, etc.). They can also be used as a container
for fog or cloud effects. Regular backgrounds do not cast shadows; if you want this, simply use a 2D primitive placed behind the object.
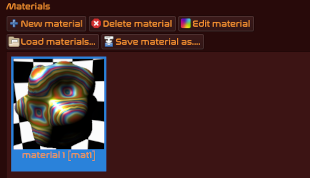 Below the main window, you'll see the materials used in your composition. You can add new ones if needed (Mandelbulber already includes a number of materials that are
included with the installation). To edit a material you can click the edit button or go to the material editor on the left. You can use gradients or a single color. There are four different algorithms for the gradient, with the single color you can load an image texture (set the single color to
#ffffff for the best result). It's also possible to mix the gradient and single.
Below the main window, you'll see the materials used in your composition. You can add new ones if needed (Mandelbulber already includes a number of materials that are
included with the installation). To edit a material you can click the edit button or go to the material editor on the left. You can use gradients or a single color. There are four different algorithms for the gradient, with the single color you can load an image texture (set the single color to
#ffffff for the best result). It's also possible to mix the gradient and single.
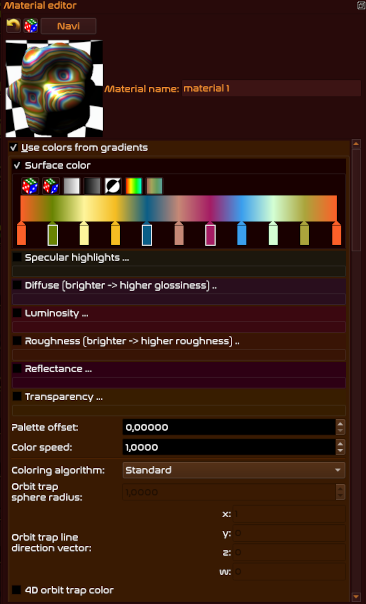 You can go wild if you add some iridescence, luminosity, gradient specular
highlights or reflections. Other options include making a transparent material and if you enable Fresnel's equations for reflectance you can create a glass
or diamond material. For coloring by numbers please use the manual in the help menu, this is way too detailed for this page. With a normal map texture you can
create the illusion of a deformed material and with displacement you actually deform the shape. This is sort of a height map feature and I suggest when you
want to use it to create the material before starting to explore objects (especially if you use a big height). Image textures can be fractalized (slows down
rendering) and there are four different mapping types (displacement does not work with the cubic type). With the Navi button on top of the tab you can open a navigator
for fast editing.
You can go wild if you add some iridescence, luminosity, gradient specular
highlights or reflections. Other options include making a transparent material and if you enable Fresnel's equations for reflectance you can create a glass
or diamond material. For coloring by numbers please use the manual in the help menu, this is way too detailed for this page. With a normal map texture you can
create the illusion of a deformed material and with displacement you actually deform the shape. This is sort of a height map feature and I suggest when you
want to use it to create the material before starting to explore objects (especially if you use a big height). Image textures can be fractalized (slows down
rendering) and there are four different mapping types (displacement does not work with the cubic type). With the Navi button on top of the tab you can open a navigator
for fast editing.
 Most of the time after
I am satisfied with the objects and materials I start to add the effects. The effects tab is divided into five main sections. Most important of these
is of course "Lights", you can use several light source on your objects. There are several types of sources to use, Directional light is the
most common. Each light can be set to be penetrating and can cast shadows (the cone value will determine the sharpness). If you make the light
volumetric it is best to start with a low value and then start to increase. The Common light options (standard on black) can be used to adjusts
the overall brightness and color (you can also alter the brightness in Image adjustments as a post effect). With Random lights options and
and Orbit trap you can create multiple visible light sources in the image (set the Visibility on zero if you only want the light
but not the source), adjusting the parameters for these can best be done in the navigator.
Most of the time after
I am satisfied with the objects and materials I start to add the effects. The effects tab is divided into five main sections. Most important of these
is of course "Lights", you can use several light source on your objects. There are several types of sources to use, Directional light is the
most common. Each light can be set to be penetrating and can cast shadows (the cone value will determine the sharpness). If you make the light
volumetric it is best to start with a low value and then start to increase. The Common light options (standard on black) can be used to adjusts
the overall brightness and color (you can also alter the brightness in Image adjustments as a post effect). With Random lights options and
and Orbit trap you can create multiple visible light sources in the image (set the Visibility on zero if you only want the light
but not the source), adjusting the parameters for these can best be done in the navigator.
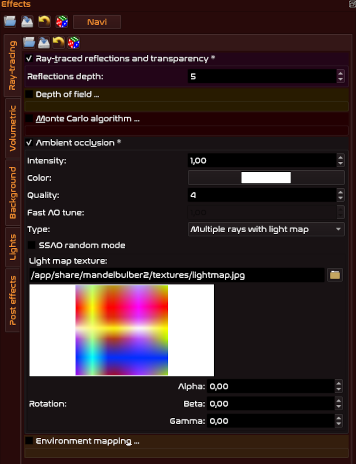
Ray-tracing is the section where you can set the Reflections depth (if you have a reflective or transparent material). Depth of field can also be done as a post-effect. The Monte Carlo algorithm will create a more realistic image but increases the rendering time significantly. The Light map texture in Ambient occlusion also adds to the realism of the image and can create nice effects if you use a light material (especially white).
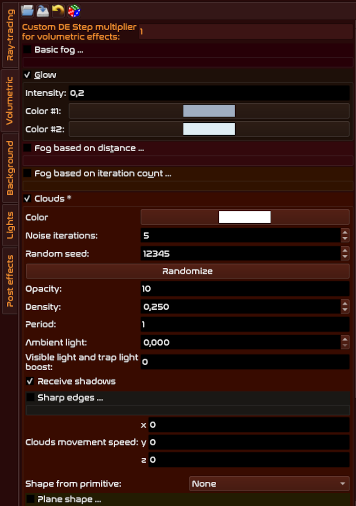 Fog, glow and clouds can be found under Volumetric in the Effects. There are three kinds of fog to choose from and all have the option
to receive and cast shadows. With the exception of Basic fog you can use a primitive as a container. Clouds can also be animated.
The background can be set to a single color or a three color gradient. You can use an image as a background (flat, equirectangular or
double hemisphere). The background can also influence reflective materials so it's always good to change this even when your object
covers the full image. A small trick I sometimes use is rendering the image with a material that is not reflective and use this as a
background while making the material reflective to create an extra dimension.
Fog, glow and clouds can be found under Volumetric in the Effects. There are three kinds of fog to choose from and all have the option
to receive and cast shadows. With the exception of Basic fog you can use a primitive as a container. Clouds can also be animated.
The background can be set to a single color or a three color gradient. You can use an image as a background (flat, equirectangular or
double hemisphere). The background can also influence reflective materials so it's always good to change this even when your object
covers the full image. A small trick I sometimes use is rendering the image with a material that is not reflective and use this as a
background while making the material reflective to create an extra dimension.
In post effects you find HDR Blur (bloom-like glow) and Chromatic aberration (Lens dispersion simulation) to use after rendering. Chromatic aberration can also be set before rendering if you use the Monte Carlo algorithm.
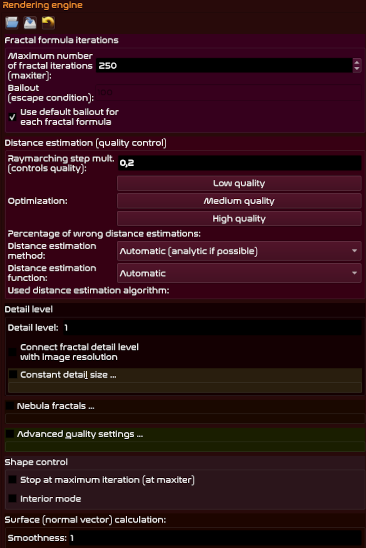 Image adjustments
and Rendering engine are the control sections for rendering the image. Image adjustments has the values for the resolution, anti-aliasing,
quality presets (this changes the values in the rendering engine), picture setting (can also be used post rendering) and camera settings.
You can use a small image resolution during your setup to speed things up but it's best to connect the detail level with the resoltution
so you will get the same result when you increase the resolution. With field of view you have another way of zooming in or out, and
there are four different types of camera perspectives. In Rendering engine you can set the maxiter and bailout to change the detail
of the rendered object. You can adjust the DE quality, detail level and smoothness to get the best result. If you want to set the shape control to
stop at maxiter for a different kind of rendering. Nebula fractals work the best with Mandelbrot fractals. Interior mode also renders
the inside of a fractal when it is limited by a box. Change the view distance limits to decrease the rendering time when your object
does not have a great depth (for instance with a surf object). With Limits you can adjust the bounding box, it is sometimes necessary
to use this when the object and camera collide.
Image adjustments
and Rendering engine are the control sections for rendering the image. Image adjustments has the values for the resolution, anti-aliasing,
quality presets (this changes the values in the rendering engine), picture setting (can also be used post rendering) and camera settings.
You can use a small image resolution during your setup to speed things up but it's best to connect the detail level with the resoltution
so you will get the same result when you increase the resolution. With field of view you have another way of zooming in or out, and
there are four different types of camera perspectives. In Rendering engine you can set the maxiter and bailout to change the detail
of the rendered object. You can adjust the DE quality, detail level and smoothness to get the best result. If you want to set the shape control to
stop at maxiter for a different kind of rendering. Nebula fractals work the best with Mandelbrot fractals. Interior mode also renders
the inside of a fractal when it is limited by a box. Change the view distance limits to decrease the rendering time when your object
does not have a great depth (for instance with a surf object). With Limits you can adjust the bounding box, it is sometimes necessary
to use this when the object and camera collide.
Mandelbulber is often described as complicated or not user-friendly, and I admit that there is quite a learning curve to it (if you compare it with Mandelbulb3D or JWildfire Swan). But once you get a grip on how things work you will find an extremely powerfull 3D fractal creator. After several thousand hours of using it I still discover new things and ways to create interesting images. I believe it is also the most versatile fractal generator around because you can combine all as you please. You can export fractals as a mesh to be used in several other applications.
Unlike a few other fractal explorers I'm not against post-editing. And after I render an image it often passes through various other image apps for color filtering, pixel corrections or total deformations. Anything goes if it enhances the end result (with the exception of AI of course, but that by definition makes it more mediocre). Sometimes I do several renderings of the same object to have even more post-editing options. Or in a setup in a boolean mode I render everything separately with a transparent background and use those in a photo manipulation app to create the end result.
Copy the code to your clipboard and import it into Mandelbulber 2.34 from there. Elements that rely on GPU rendering are turned off so the result may differ slightly from the published image.
Node based VFX compositor for pixel art - Windows (also available on Steam) & Linux - $ 15.00
![]() Pixel Composer is a node-based
tool that can be used in a variety of ways for all sorts of projects. You can download it from the website to install it, but I recommend
adding it to your Steam library. It’s still in beta, and new updates are released every few weeks. With Steam, you don’t have to worry about that.
When you launch the app, you'll see a screen displaying a few showcases and your most recently saved projects.
From here, you can also adjust your preferences and more. You can click outside this screen to start making a project.
Pixel Composer is a node-based
tool that can be used in a variety of ways for all sorts of projects. You can download it from the website to install it, but I recommend
adding it to your Steam library. It’s still in beta, and new updates are released every few weeks. With Steam, you don’t have to worry about that.
When you launch the app, you'll see a screen displaying a few showcases and your most recently saved projects.
From here, you can also adjust your preferences and more. You can click outside this screen to start making a project.
![]() At the top of the side menu, you can
choose how the user interface behaves. Below that are the project settings. If you want to start from scratch it is necessary to set the dimension.
If you want to start with an image import this can be ignored.
At the top of the side menu, you can
choose how the user interface behaves. Below that are the project settings. If you want to start from scratch it is necessary to set the dimension.
If you want to start with an image import this can be ignored.
![]() Right clicking in the projects area will open
the nodes selection. At the moment there are over 200 nodes you can choose from. You can favorite a node so it
will be added in the Home section, this is helpful if you use this node frequently. By selecting a node you can add it anywhere you want it to go
in the project area. Once placed you can connect it to other nodes (or even create a loop or feedback). Double click on a node to see the result in the preview
section.
Right clicking in the projects area will open
the nodes selection. At the moment there are over 200 nodes you can choose from. You can favorite a node so it
will be added in the Home section, this is helpful if you use this node frequently. By selecting a node you can add it anywhere you want it to go
in the project area. Once placed you can connect it to other nodes (or even create a loop or feedback). Double click on a node to see the result in the preview
section.
![]() In the side menu you can adjust
the values from the node and you will see the effect in all connected nodes. This modular way of working makes it very easy to quickly make adjustments.
Properties also have a toggle button for animation. You can right click on the preview to save as an image. If you want to make an animation (gif or mp4) you
have to add an export node in your project.
In the side menu you can adjust
the values from the node and you will see the effect in all connected nodes. This modular way of working makes it very easy to quickly make adjustments.
Properties also have a toggle button for animation. You can right click on the preview to save as an image. If you want to make an animation (gif or mp4) you
have to add an export node in your project.
Pixel Composer is the brainchild of a single person who develops everything on his own. There is a Discord server where you can connect him for help (the link is in the store page on Steam). I have not tried out every single node (yet), so I am far from an expert in knowing it's full potential. My main use is creating textures for materials in Mandelbulber (the Normal node is pretty useful for that) and the creation of gif's. I have a few projects saved for these purposes and herein lie the great advantages of the software. Because once you have made a setup of nodes it's so easy to adjust everything. You can add/remove nodes or alter the settings of every node, so you get totally new results in no time. It's not uncommon to experience a crash (it has an autosave so no real worries), but bugs get fixed with every update. Even though I'm a sucker for FOSS, this is definitely worth the money. If you are a Krita user, certainly get a look at it because it has nodes to import files and layers.
There are plenty of other tools that come in handy when working with images. Here, I’ll briefly discuss a few of them.
 Raster graphics editor - All platforms - Free
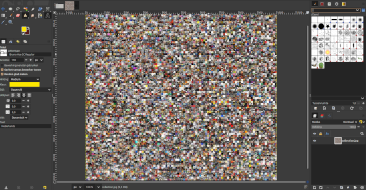
GIMP (short for GNU Image Manipulation Program) can be used as an image editor,
for photo retouches or free-hand drawing. It supports an amazing amount of image file formats. It has basic fractal applications for filtering
and rendering. There are third-party plugins you can add for even more functionalities and it's possible to write scripts.
 Vector graphics editor - All platforms - Free
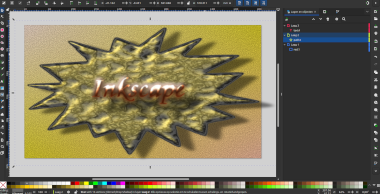
Inkscape is an ideal artistic illustrator for logos, banners, buttons and more. Because it uses vector in stead
of raster rendering it is not bound to a limited number of pixels, so your results will always stay sharp in every resolution. It's main file format is
svg but you can import or export to many other formats. There are several build-in filters you can use which are highly adjustable, and it's
possible to create your own filters (if you are an expert).
 Digital painting software - All platforms - Free
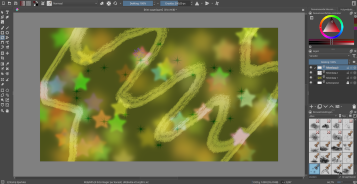
Krita is a great tool if you are into free-hand drawing. But it's also very handy for those (like myself)
who do not have that talent. If you use it for drawing, a graphics tablet is indispensable. It comes with the G'MIC
plugin by default, which has over 600 different filters. Krita also has a tremendous amount of layer filter masks and layer styles.

When you first start building your own website, the first hurdle is always learning the language (of both html and css). And just like with spoken languages it's always handy if you memorize the basics. Use W³ Schools to get you started. Yet unlike a spoken language there is no room for errors or interpretation in coding. A simple mistake can mess up a whole page and it's not always obvious to find what went wrong. So be very structured and articulate when you write code. Think of a browser as something dumb and simple that you have to explain everything to, down to the smallest detail. And to make matters worse, every browser has it's own dialect. It's best to test your code in the most common browsers (even the crappy ones) to see if they display everything correctly.
To give your users the best experience so they will gladly visit your site again (and isn't that the point), there are some pitfalls you should try to avoid. These words are just my opinion, you can do whatever you want and prove me wrong. And of course nothing is perfect and everything can be improved.
Most users have no clue where a link leads to, they just click on it. So if you name a file it's always best to use something that is clear for yourself to avoid broken links. A website is usually built using a modular approach, and a clear structure ensures that everything runs more smoothly. Create as many folders as necessary so what belongs together, stays together. I advise using an alphabetical or numerical approach, this will be helpful in the listings order (maybe you have noticed I am a big fan of hexadecimal number. The names of my images are nowadays the date and hour of the creation preceded by L or P).
Internal links in your web can be relative (without the http://domain.whatever/, only /folder/name.extension) but once you give a link to somebody else always use an absolute URL. If you don't these links are broken.
When your website is still in an under construction status, make sure that your links lead somewhere (even a simple page with a link back to the index is fine). Too many broken links is very annoying and give a bad impression. If you use a website template to get started this is often the case.
The navigation menu is the skeleton of your website. Every page should be accessible in only a few clicks. A page that has no navigation link (or not an obivious one) so people have to use their browser arrows is very annoying.
It is essential to think thoroughly about how you will create a navigation. Once your site is getting bigger it will be plenty of work to adjust every page if you want to change the navigation (especially if you code online). There are several ways to avoid this, search for your best option beforehand.
Back in the old internet days it was uttermost important considering the use of bandwidth because you had to pay by the hour of modem use. Even nowadays I recommend thinking about it, even though most of us have fast internet you are also depending on the server's bandwidth. How fast a page loads will affect the perception (I know patience is a virtue but still), so try to avoid too many huge files on a page. For instance why should you use a lossless image format with a high resolution and reduce it to fit your page, if you can use a smaller lossy image with the maximum resolution that you need. In my case I use small internal thumbnails (.webp files with a low resolution) that lead to bigger external high resolution .jpg files (with a warning that loading them can be slow).
Use effects but don't abuse them. In my view a good effect is something you will only notice when it's removed. Also these effects should enhance your experience. Sometimes I have to start clicking at random because it is unclear if object are links or I get a paranoid feeling because there is a huge object following my cursor.
Make sure there is enough contrast if you plan to use many colors. Like myself there are a lot of people who have some form of color vision deficiency. This is very important for reading, it happens that I have to select some text to make it readable. Also make sure your text size is big enough for all your visitors (at least 12 pixels).
When you use audio (auto loading) on your web I strongly suggest placing a stop button on the page. When surfing lots of people listen to some audio stream and a collision between multiple sound sources is not a good thing.
Lightweight programming editor - All platforms - Free
 I prefer to do my coding offline.
This has many advantages like always having a backup or not to have your cache cleared when you make changes to the css file to view the result.
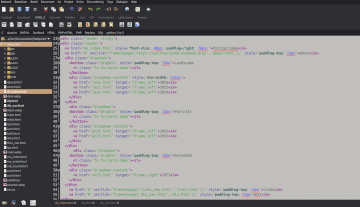
The editor I use for this is Bluefish.
This software has support for html, css and javascript (and several other programming languages). It is highly customable so you can make it perfect
for all your needs. It has an in-line spell checker, in-line reference and auto-completion with tag closing. There are some templates you can choose from and you can generate the
code for several objects automatically when inserting. It uses different colors for types of code and when making a typo error this feature will make it
a lot easier to track down the error.
I prefer to do my coding offline.
This has many advantages like always having a backup or not to have your cache cleared when you make changes to the css file to view the result.
The editor I use for this is Bluefish.
This software has support for html, css and javascript (and several other programming languages). It is highly customable so you can make it perfect
for all your needs. It has an in-line spell checker, in-line reference and auto-completion with tag closing. There are some templates you can choose from and you can generate the
code for several objects automatically when inserting. It uses different colors for types of code and when making a typo error this feature will make it
a lot easier to track down the error.